
Monday Miniatures: Now hear the word of the Lord

This week there perhaps a dozen mini related Kickstarter projects posted. Exciting, right? Wrong. The vast majority of them were printable scenary for wargamming, and when I talk about paper castles, I don’t mean awesome ones, like the papercraft fever dream, pictured above.
It’s a good thing that Kickstarter declared that their service is for everyone, or I would be tempted to rant at length about how the crowdfunding service is for dreamers, not product lines (and half-assed ones at that.)
So, this week there are only 2 projects I feel like sharing.
Worldsmith Industries – Just had a tank explode, and need a marker for the battlefiled? This project has you covered.
Creative Gamescapes – This project want to make 3D terrain for all your scifi gaming needs. Definitely some cool stuff.
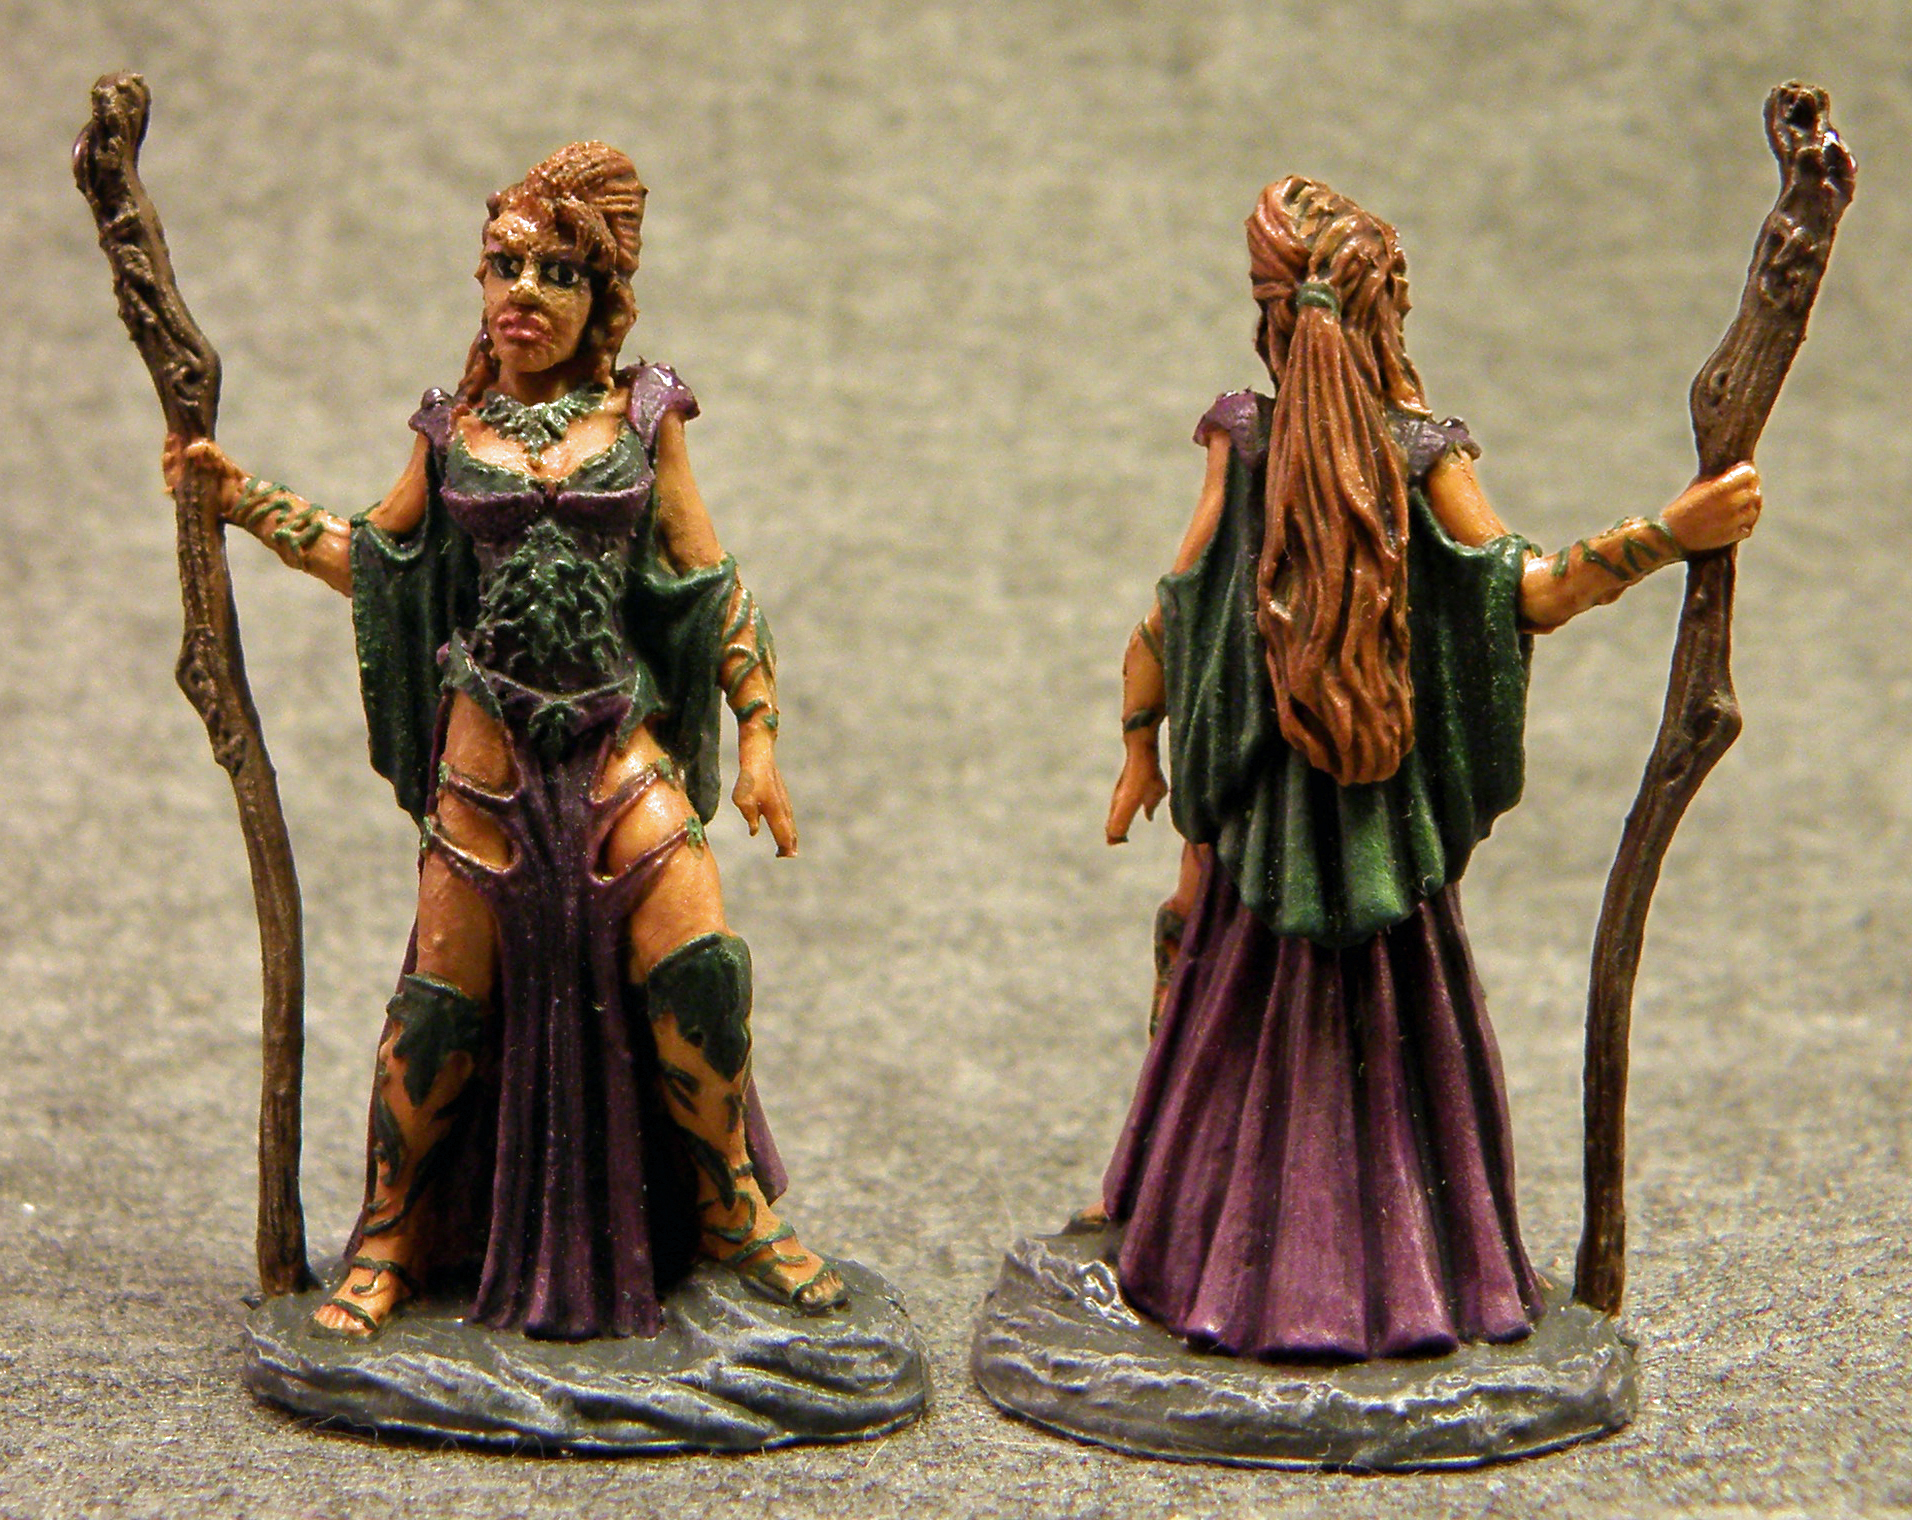
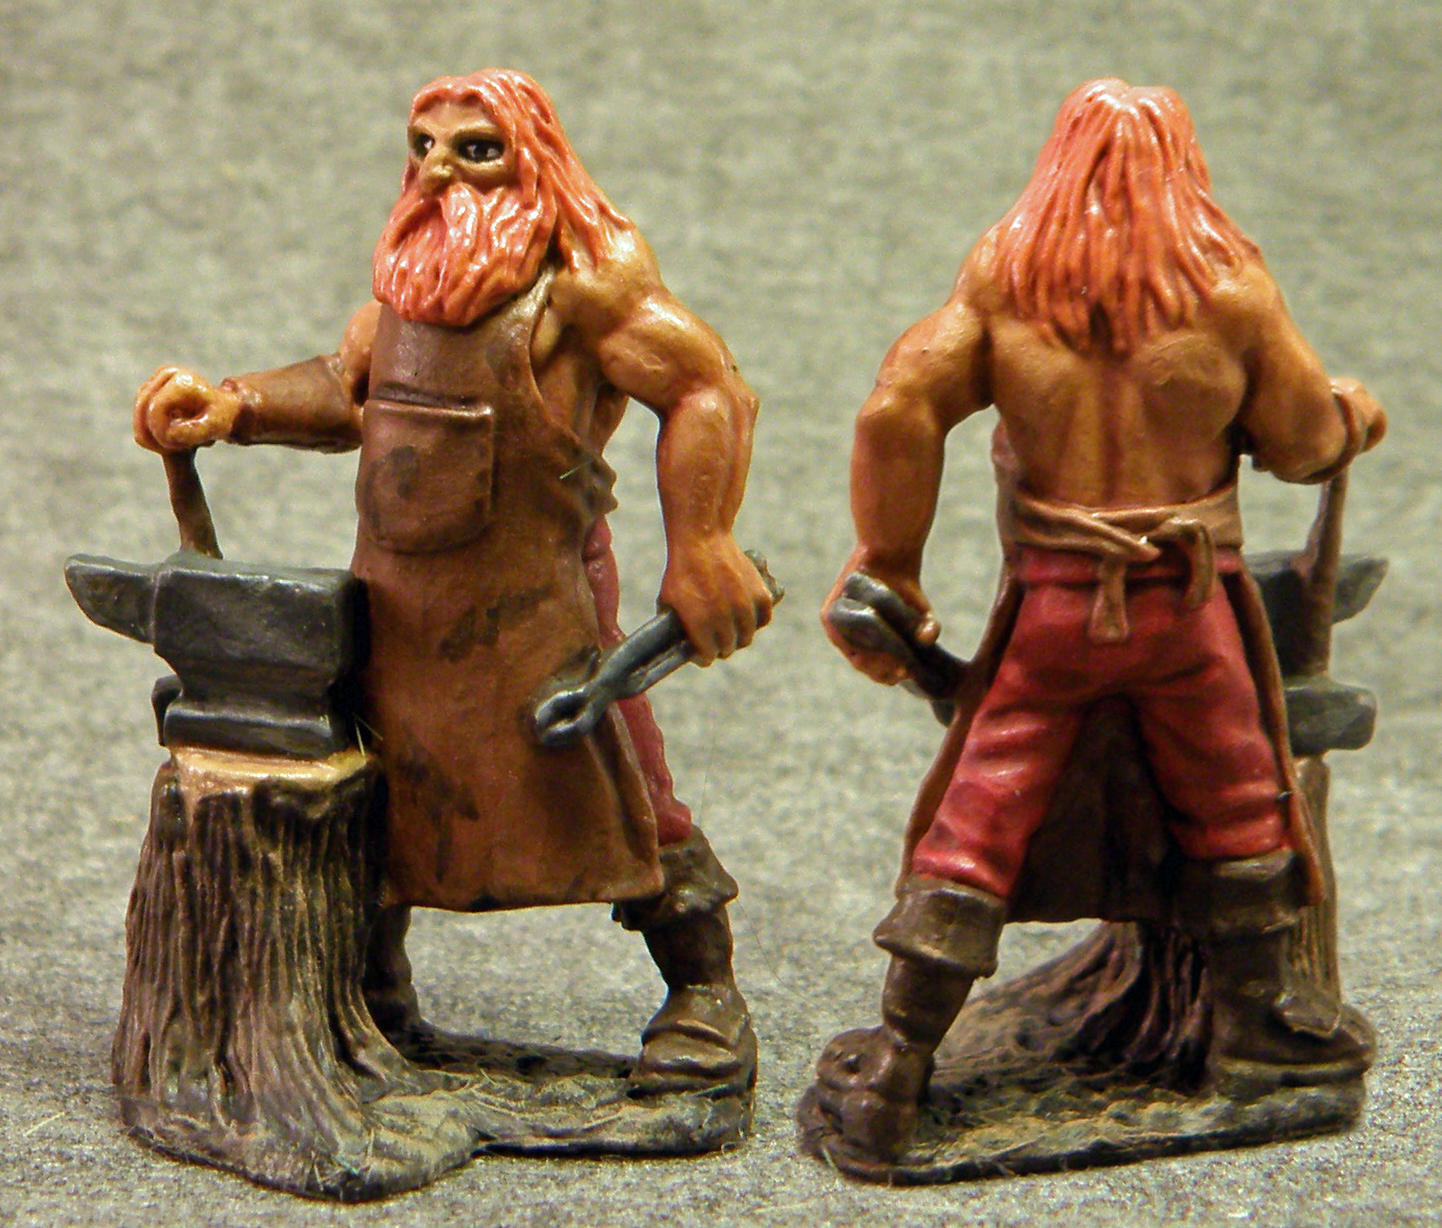
Jessica sends us two painted minis this week, and did an amazing job on these Bones.
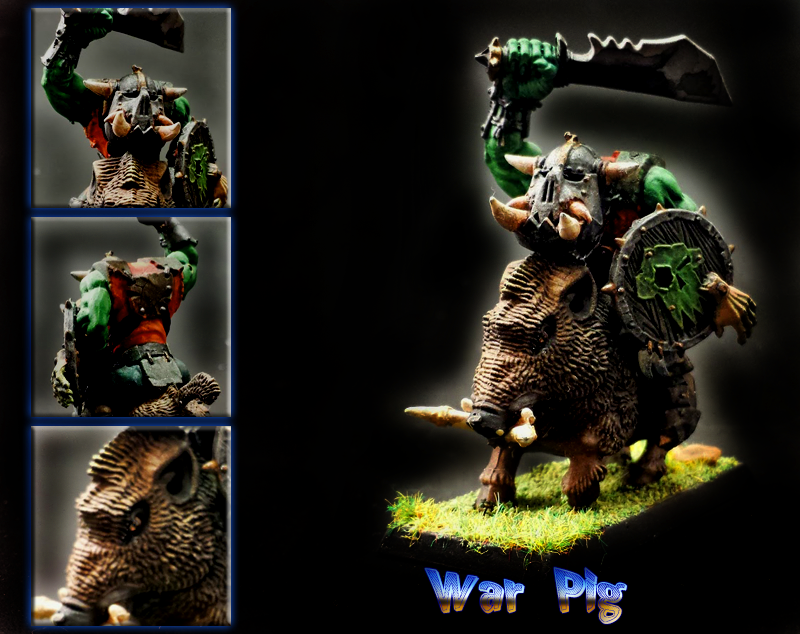
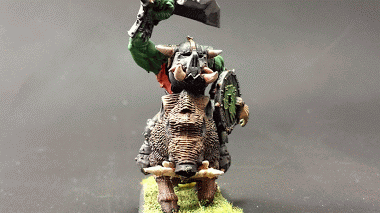
Clint is back to his orcs and sent in this photo along with the last part of his review/how-to.
Clint here again — ok, so I didn’t use a Bones mini this week, but this last part really doesn’t have anything to do with Reaper’s minis. This week, I’m going to talk about taking and editing photos of your painted minis, as well as show my workspace. Because for some reason, David is fascinated by it. Me, I’m mostly just embarrassed by it. It’s a mess. A literal mess. Just look at this desk, would you?

About the only bit I want to point out is the use of bottle caps as mixing pots for washes and glazes. Cheap, prolific, and perfectly sized. Screw yogurt pots or paper cups. Bottle caps are usually just thrown away and can be found everywhere, particularly if you’re a soda fiend like myself.
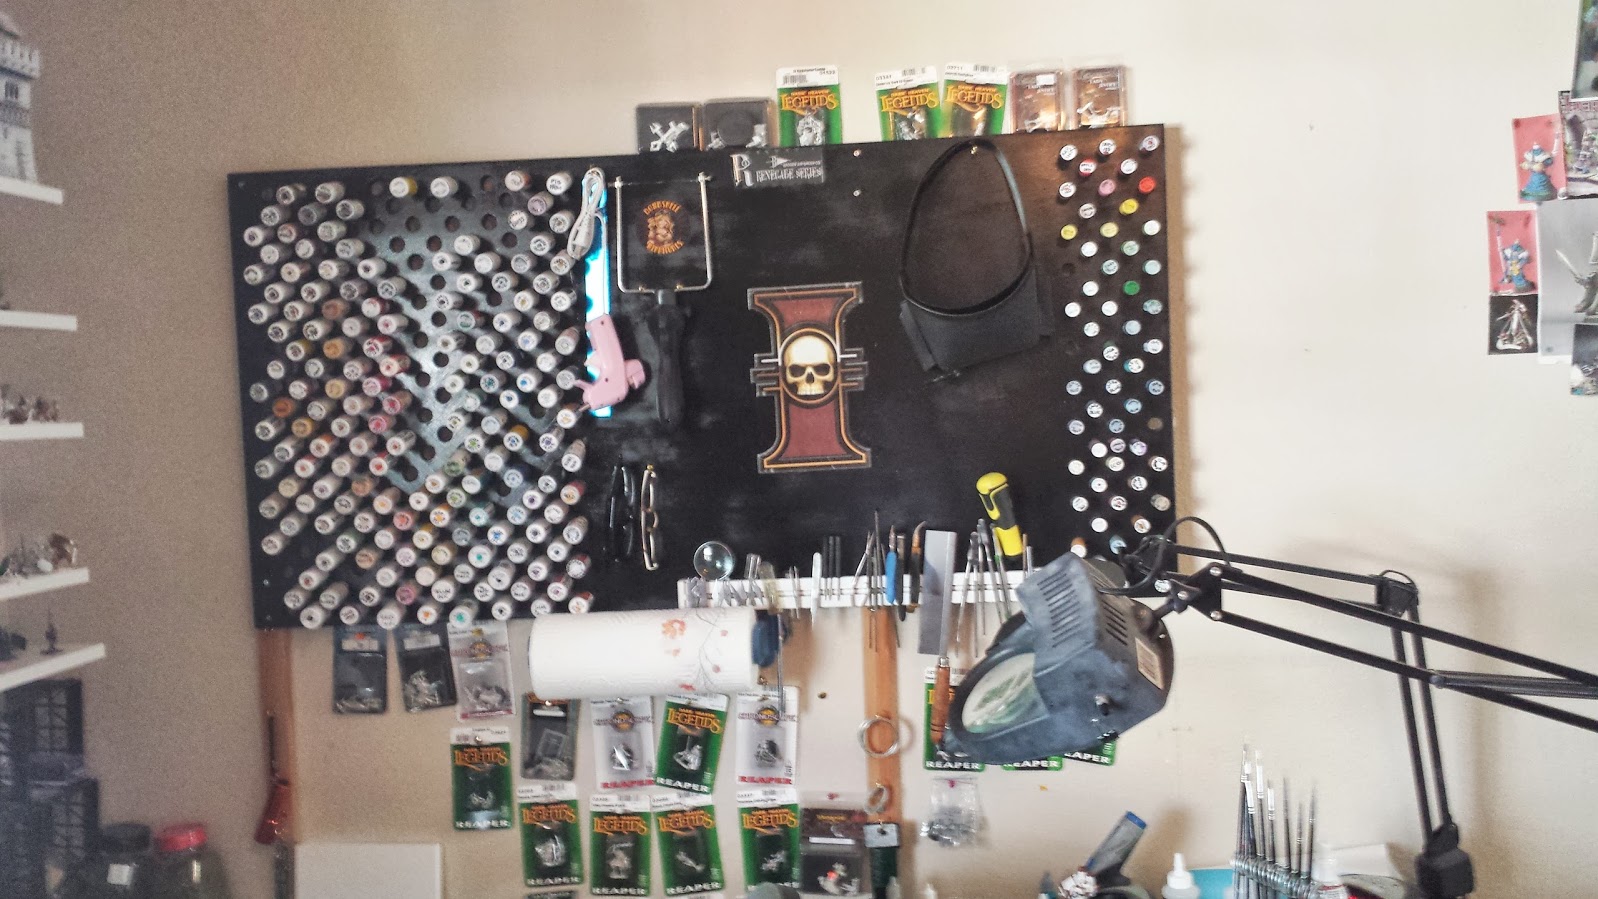
Ok, I am proud of this bit. This is how I store my paint. Everything goes into a dropper bottle, even the GW paints. I buy them in bulk from US Plastics for about a dime a piece. The rack is a 4 x 2 sheet of half inch MDF that I drilled 5/8th inch holes in a staggered pattern into. This is in turn mounted to two 1 x 2 rails mounted to the studs in the wall above my painting desk. The paints are labelled on the bottom and arranged by hue. This is important to me, since I’m colorblind and can’t just spot the blue paint mixed in amidst the reds. A magnetic bar and few brass hooks hold a variety of tools from files to drills to reading glasses and magnifiers.
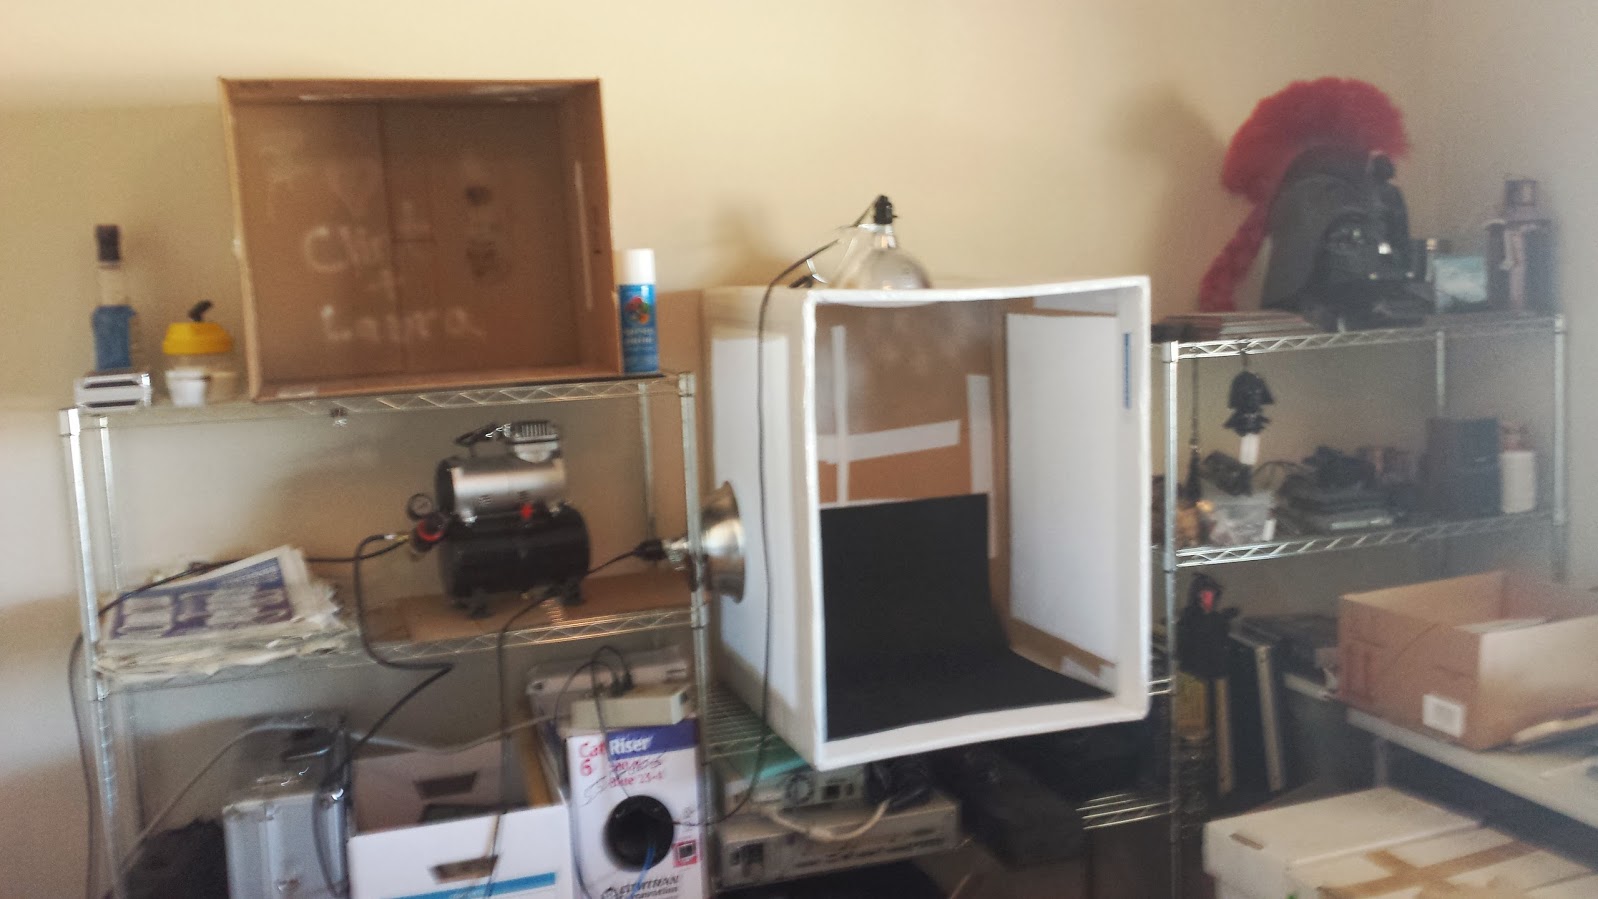
Right. So here’s the other half of the room. Airbrush station and my lightbox (and metric ton of other crap…) The lightbox is what I’ll be working with next. It’s nothing more than a large cardboard box that I cut holes into three sides and then covered those holes with a sheer white cotton fabric. A few worklamps on the sides and top allows a diffuse light to fill the box and eliminate shadows. These days I have a black posterboard shoved in there to act as a background, but I’ve used plain white and some printed “cloudy skies” in the past. So I just stick a mini in there and shoot a bunch of different angles, trying to keep it in the same spot, just rotating it around. Like this…
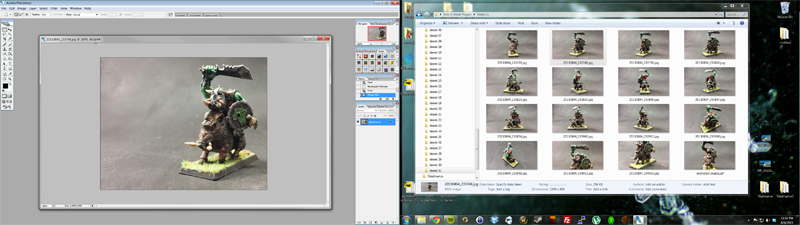
I’ve an older Kodak digital camera that I sometimes use, but these days, my Galaxy S4 is my camera of choice. Anyhow, once I’ve grabbed a dozen shots or so, I move them to my computer and open up Photoshop. First step is to pick my “main” photo and crop it to size.
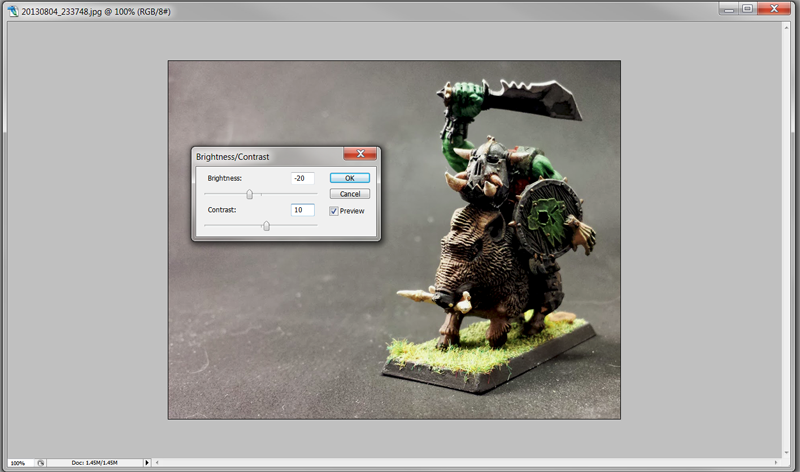
Can you believe that background is the black posterboard? That’s the wonder of the lightbox for ya. So this next step is the only part where I truly alter the photo by bringing up the Brightness and Contrast sliders.

I’m trying to get the black areas black, while keeping as much vibrancy to the photo as possible. The settings are never the same twice, so I just play it by ear. Again, the goal is to make the blacks black without making everything else too dark. So, practice is about all I can suggest there.
The background is still too light and the camera picks up every cat hair, bit of lint and speck of dust in the ‘box. So here’s where I whip out the Burn Tool. This requires multiple passes, set at 65% exposure, with increasingly smaller brush sizes to bring the background all the way down to black.
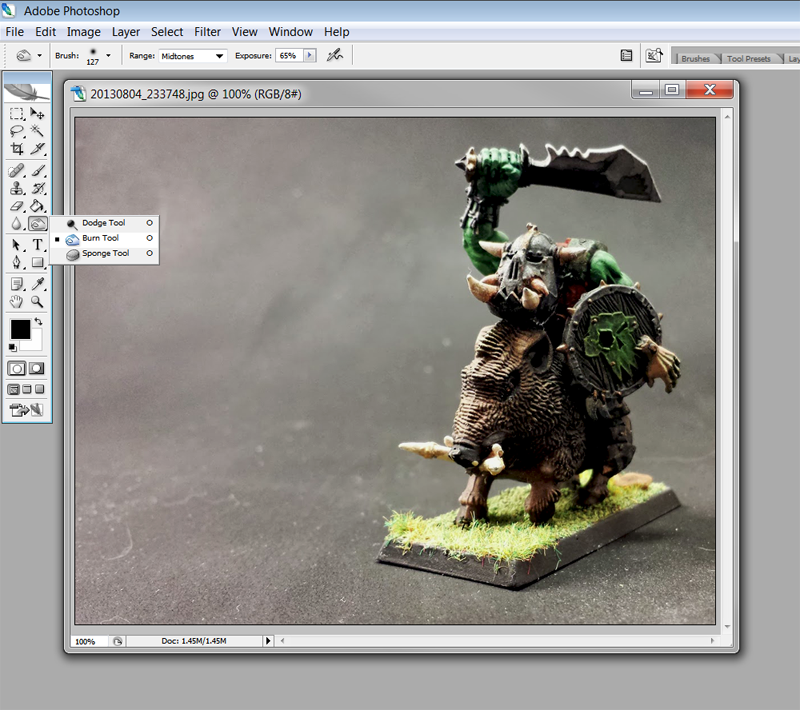
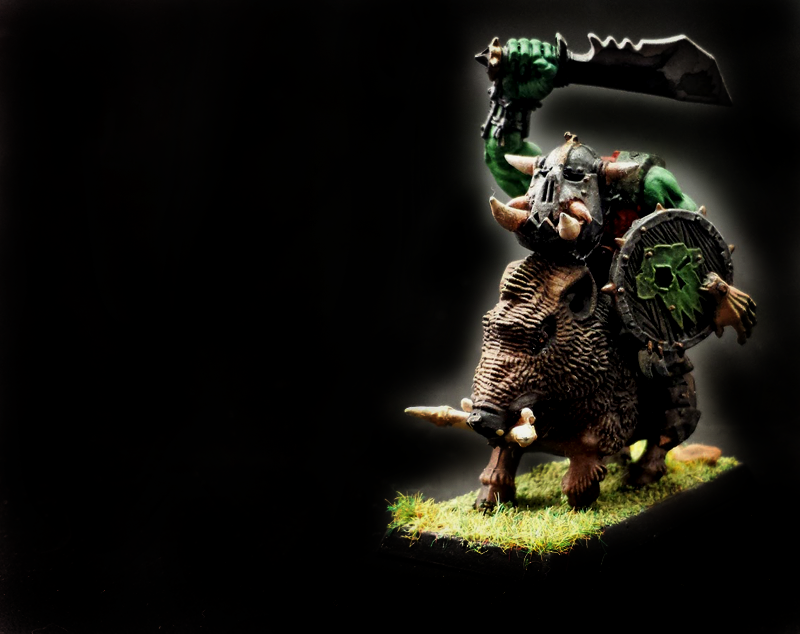
Start on the outer edges and work inwards. I try to not hit the mini itself at all, I’m trying to keep it as close to “real” as I can. I confess to often burning out the sides of the base to blend into the black background, tho’. I find it aesthetically pleasing. Anyhow, it should end up looking something like this:
The next step is finding other parts of the mini I’d like to showcase. Details and the like. I create a new image, sized 200 x 200 pixels, then cut and paste other photos into that as new layers. I move the image around until the 200 pixel frame shows the bit I’m trying to focus on, then I cut and paste _that_ into my main photo. Repeat this step a few times to show off what you want.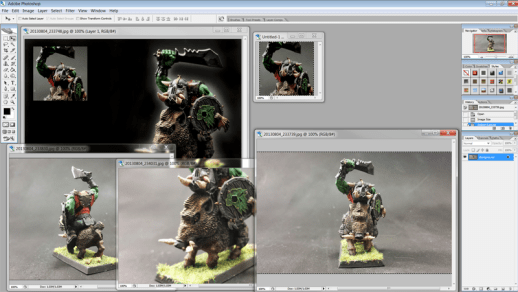
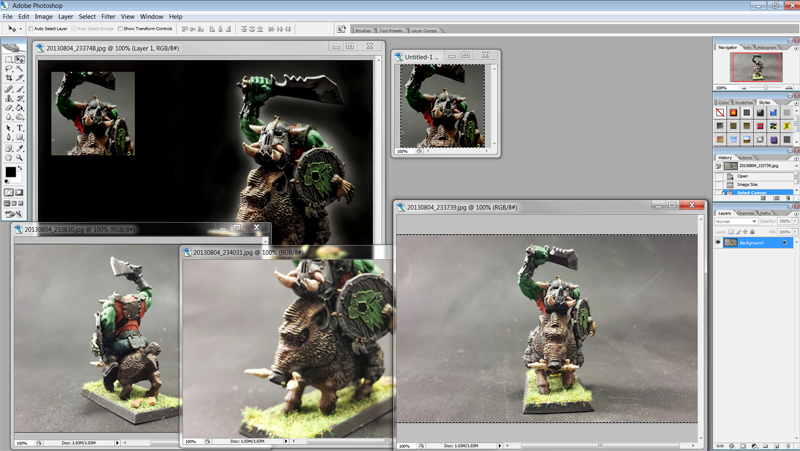
I use a few layer effects to offset the inserts, like a bevel and outer glow. But now we’re just talking personal preferences. Add a label, or not, as you choose, then “Save for web” to compress the file size. Voila’! We’re done.
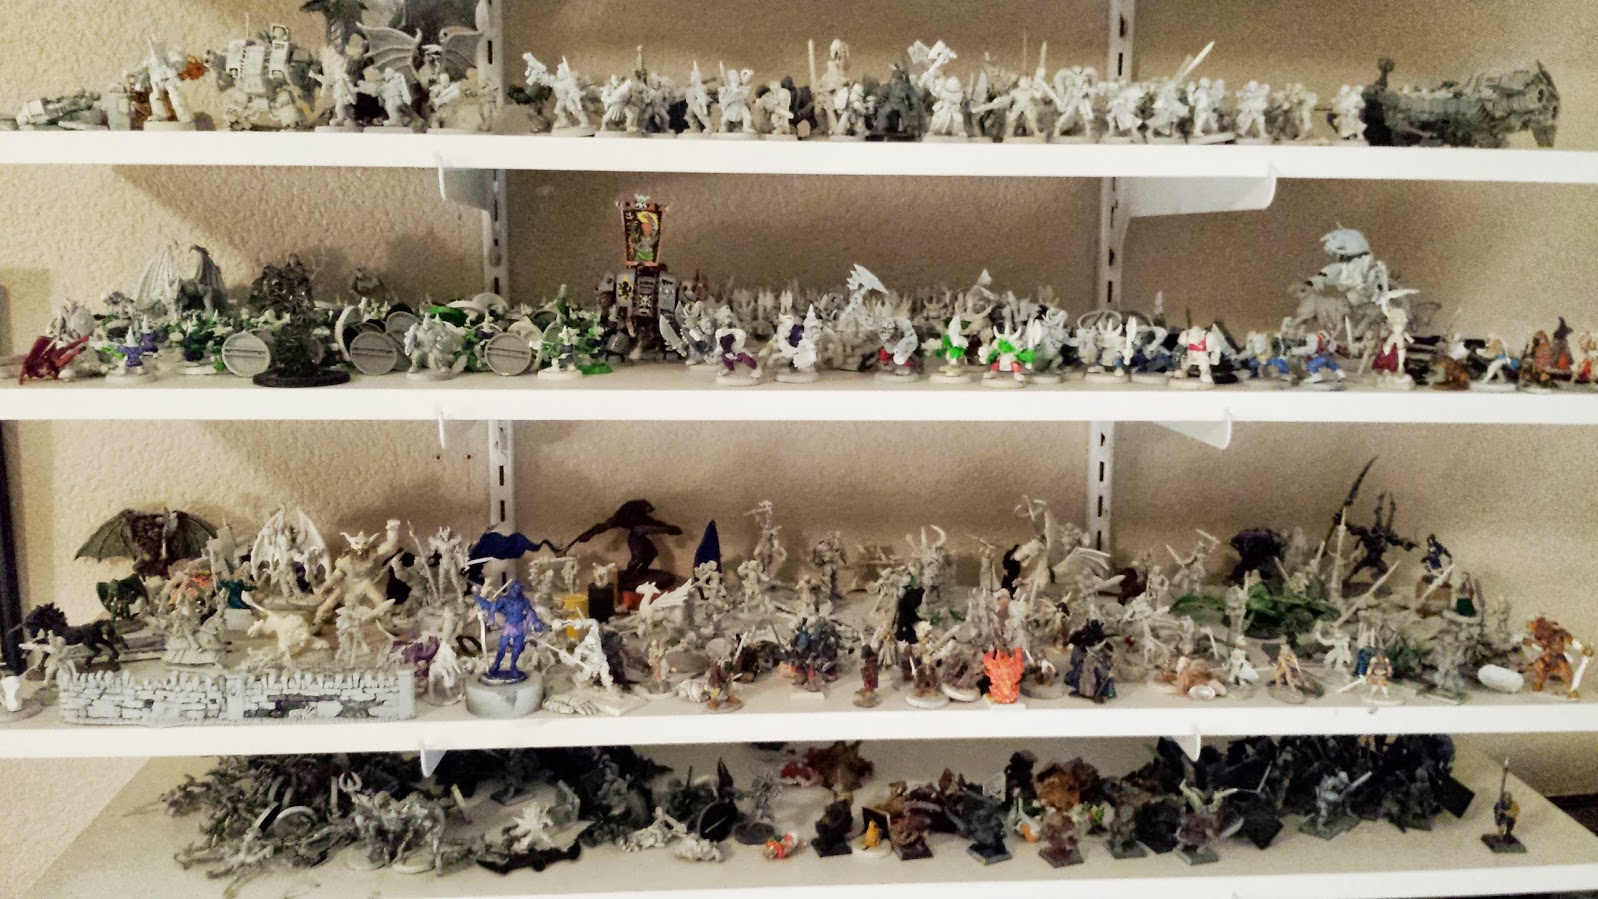
I hope folks found these last few weeks helpful. Usually, my advice on painting is just “slap paint on it and move it around” and I’m not sure I really improved on that all. I’ve been painting for a few decades now, and I still think I suck, so when David asked me to write up a review and shed some light on how I paint, I was a bit flabbergasted and a bit flattered. Still, it’s been fun and look forward to another half year of “Miniature Mondays”! Lord knows, I’ve got plenty to paint… here’s a look at my Shelf of Shame. I’ve got enough to last me a few years at one a week!
– Clint K.

David, the papercraft temple is awe-inspiring. Note to self — do not start yet another hobby. Do NOT.
Pingback: Monday Miniatures: Yephima | Caffeineforge