
Monday Miniatures: Well of Chaos
 This week we stare into the dark heart of evil. Well, a portal to it at least. This week we had outstanding participation on our weekly painting event. Fully 12 people sent in their own personal take on wells of ultimate evil.
Run, Fight, or Die – I think the sculpts for this game are mediocre, but everyone loves zombies, right?
Tide of Iron Relaunch – This project has wargame minis in droves, so long as you like them teeny tiny. I’m sure you’ll see this one on store shelves eventually, I mean their previous project failed to fund and was still printed right on schedule. This one definitely falls into the category of “doesn’t really need your money.”
Journey – This project is more than a little over priced, but has truly lovely sculpts. It’s a must see.

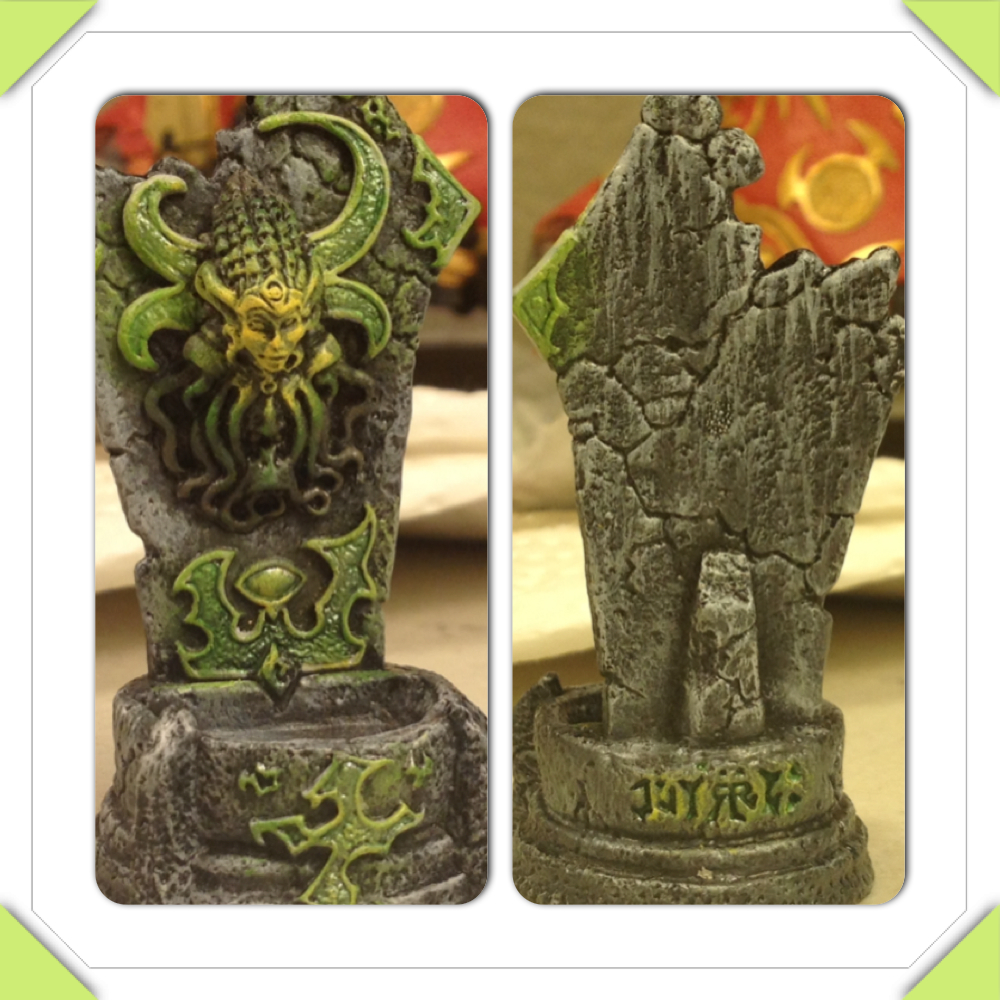
This project was lots of fun, and harder than I would have thought. I opted to try to make the cracks glow with evil eldritch power. The results were mixed.

Jessica went for more of a classic stone look with subtle color differences, but went all out on the base. The results were incredible.
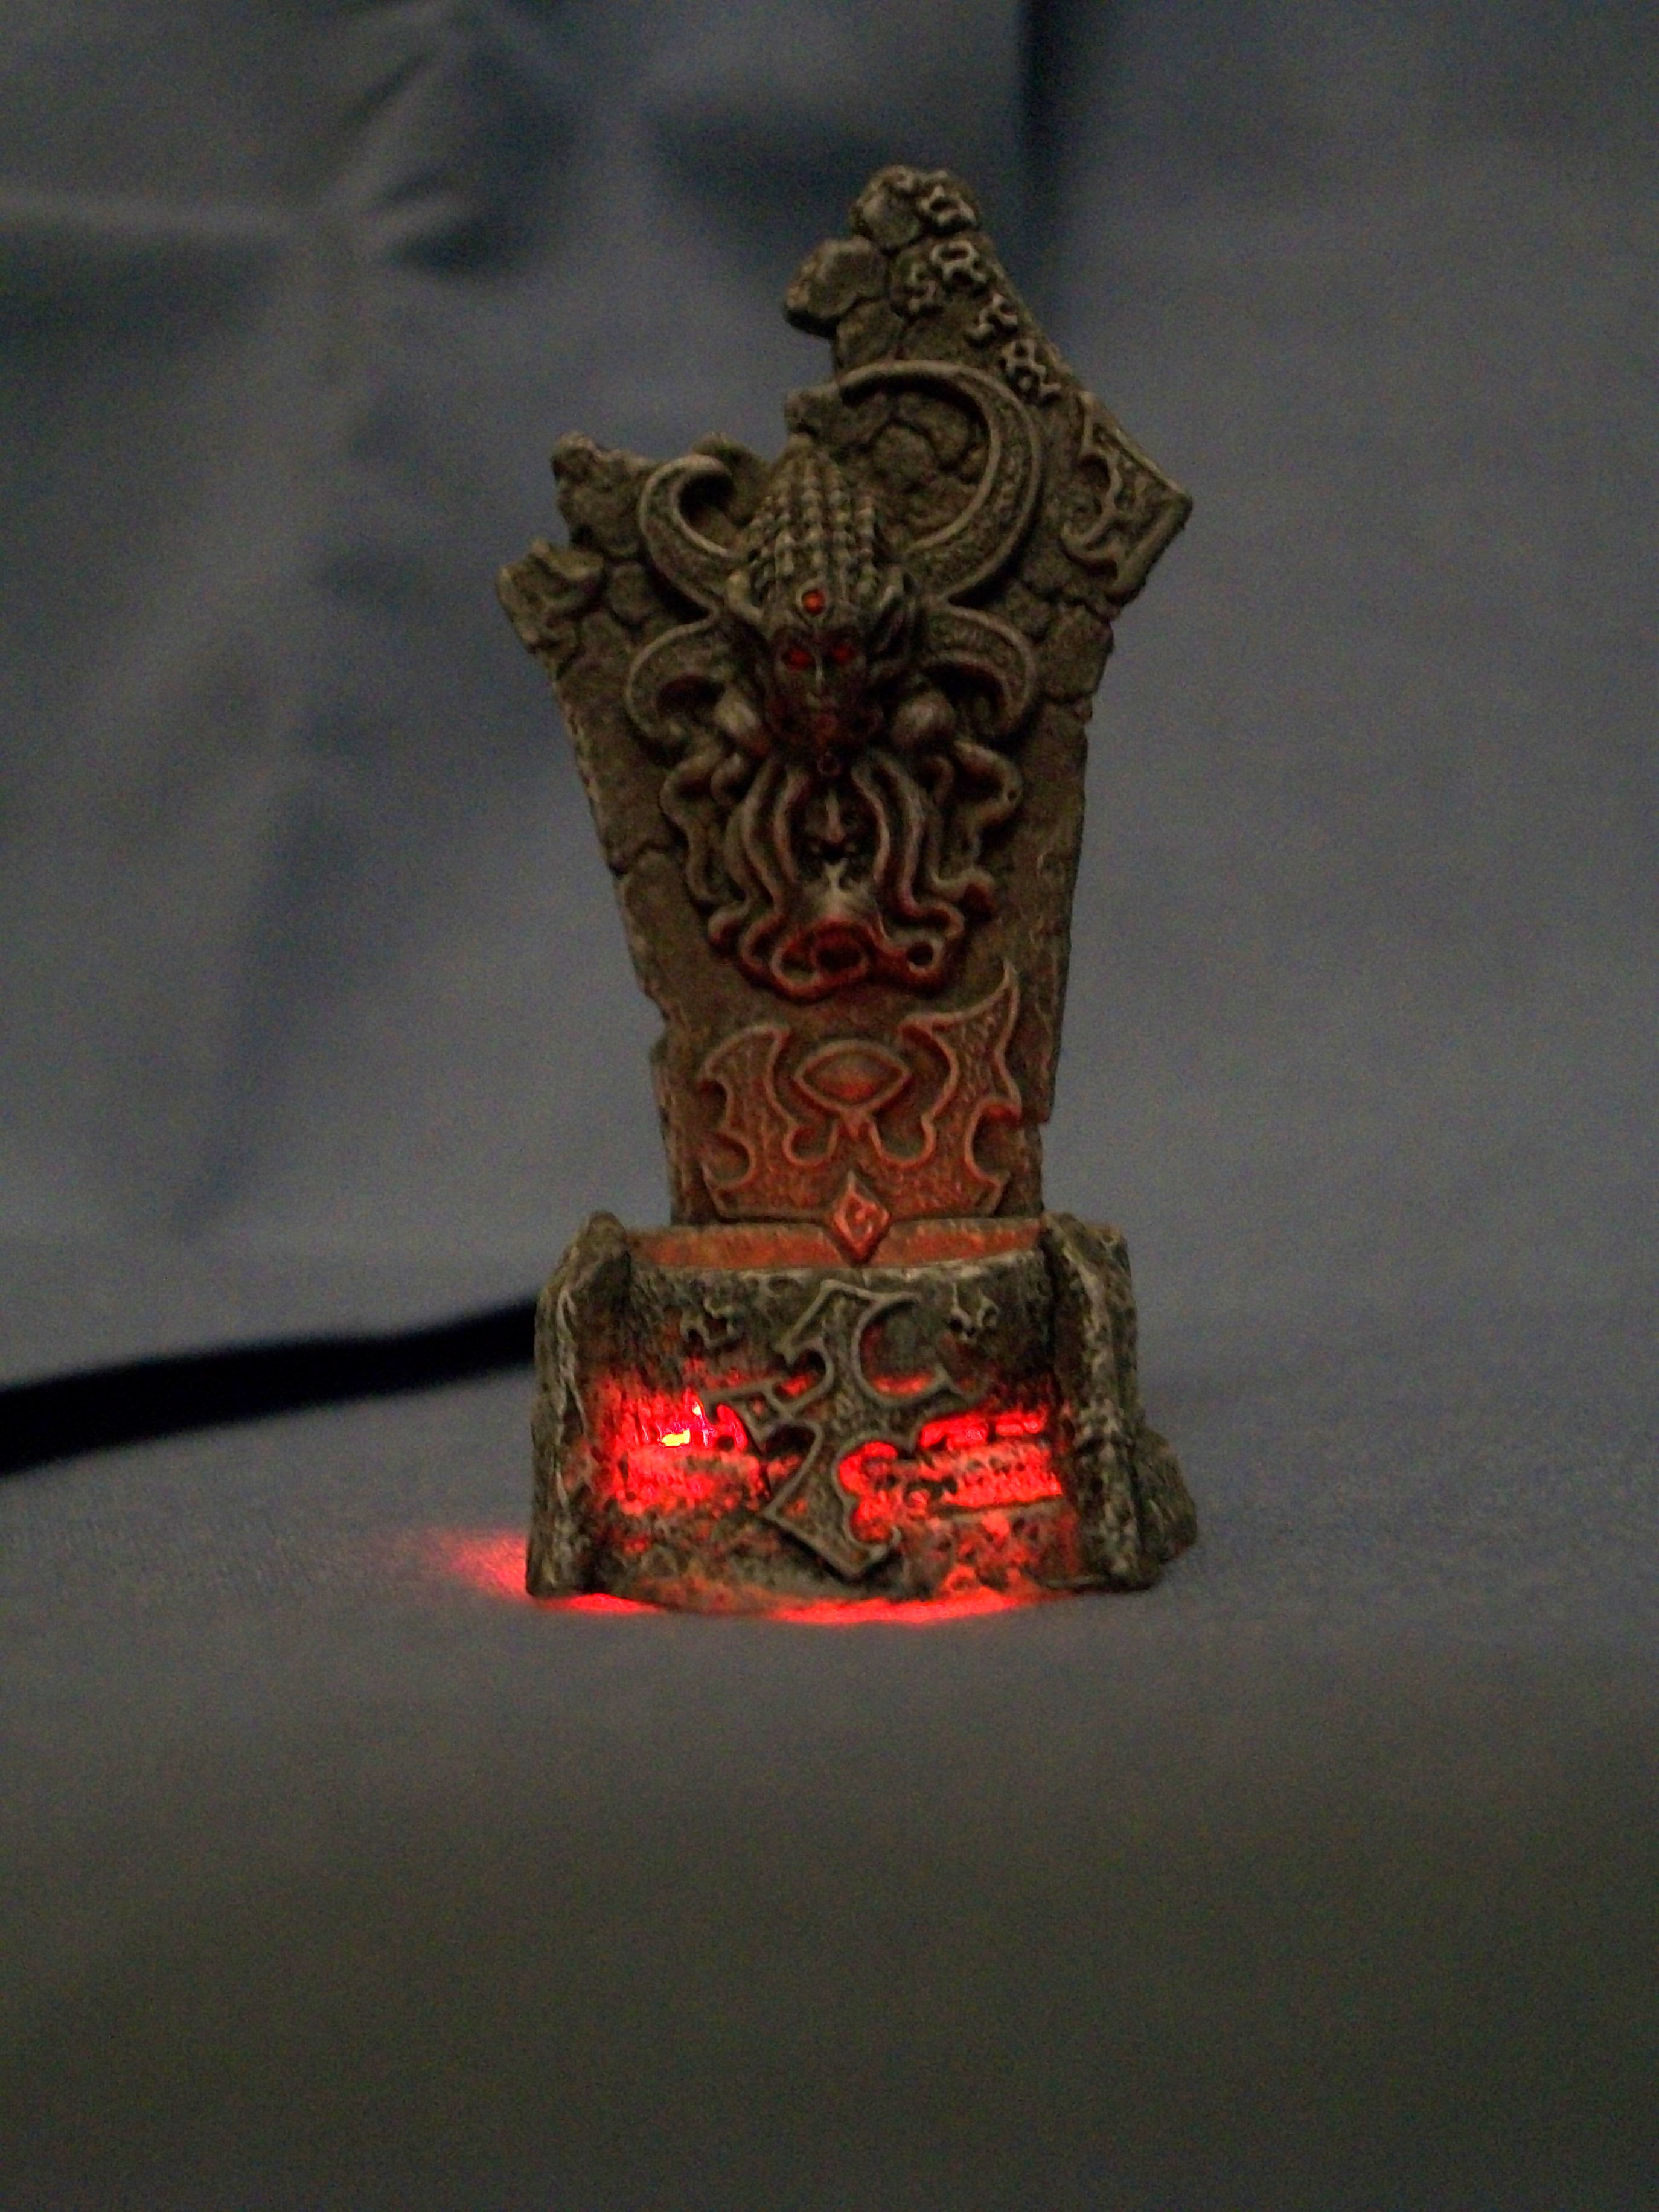
Jim added a light to his base. The effect makes the basin look like it is full of magma.

David’s fountain looks great. He did a fantastic job on that gemstone.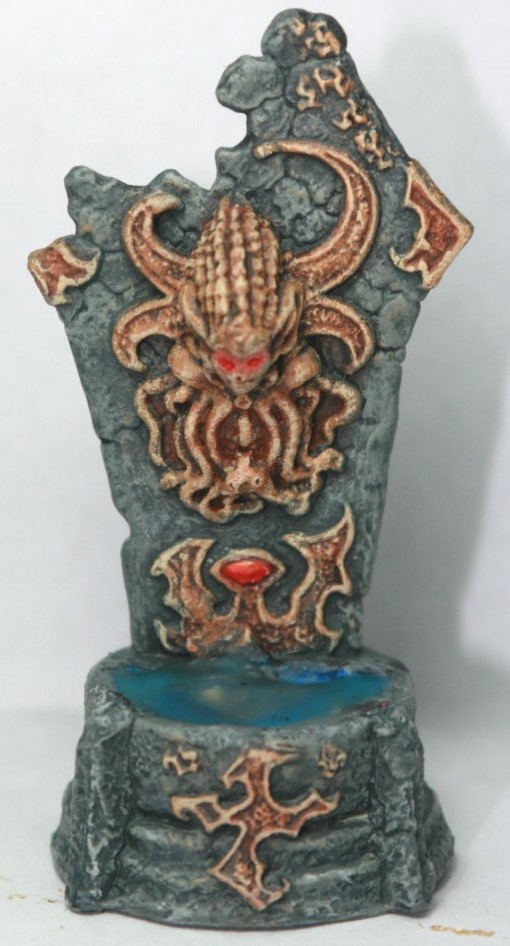
Dan did a great job on the stone. I could definitely see a group of adventurers encountering this at the heart of some dungeon.
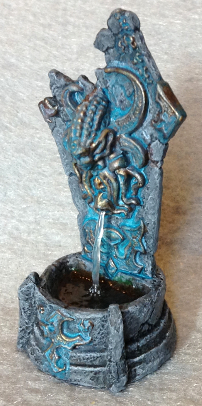
Vulture chose a strong verdigris motif, and to do some stunning water effects. The combination of the two is magnificent.

Tanya chose a very complex color scheme. The interlaced colors on the icon itself are stunning.

Magnus chose an ultra vibrant color scheme than leaves me thinking the entire artifact might be carved out of turquoise or lapis lazuli. His is certainly the most expensive well we will see today.
Jeff did some interesting lighting, and was the only painter not to fill his basin with liquid.

Arjen, like me went with a rock and bronze motif. I think that their efforts came out looking far more realistic than mine (but then I wasn’t really going for realism.)

Laura gets my vote for best looking well. I can’t decide whether I like the stone or the water effects better. This model is truly stunning.
Last up we have Clint. You might have noticed that his well looks fundamentally different than the rest. You see – Laura and Clint are married, and have only one set of bones between them.
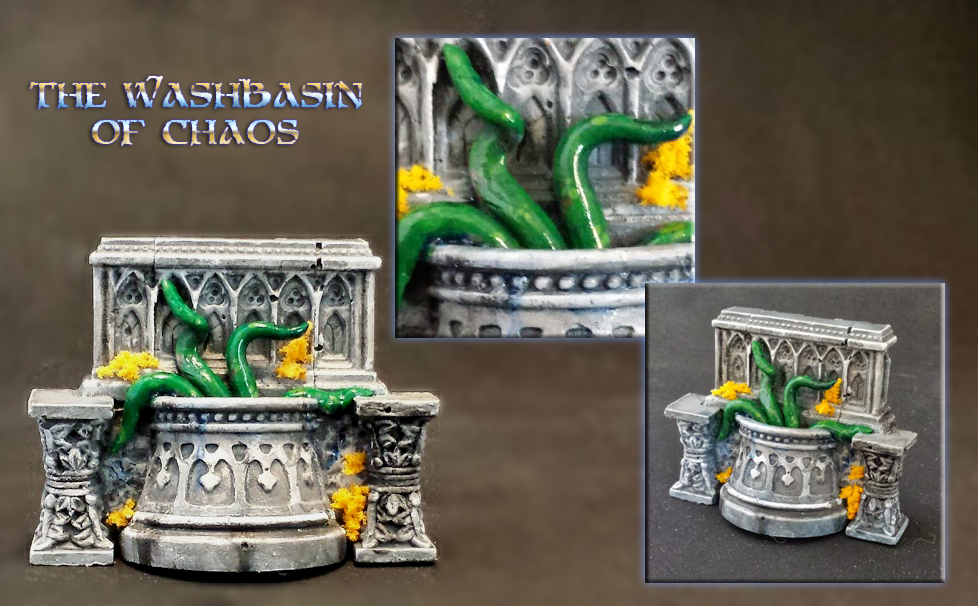
So Laura painted the well this week, and Clint built his own using what looks to be cathedral parts made from plaster of paris.
So far we have had twelve people participate. Consider my expectations exceeded, but feel free to tell your friends to join us for next week. Pictures can be sent to Caffeineforge@gmail.com
The Griffin – This is next week’s model, and it’s a big one. I’ve already started my base coat tonight, and I hope some of you have too.

Wow, so many different interpretations! I love mondays from now on! 😀
Laura + Vulture: How did you make the lovely water effects?
(AKA vulture): very quickly 😉
i cut a small piece of clear plastic “thread” from a clothing tag (fishing line will work, too) to act as an armature for the stream of water. i put it in to place with a few dabs of modpodge and a pair of tweezers. once dry it was coated it in modpodge. i then i filled the pool with a layer of modpodge that contained a small amount of ink for color. i painted some white “bubbles” around the base of the stream then added some ripples to the surface by dabbing concentric rings of modpodge and added another layer to the stream. the final step was to gloss. the whole process took only a few hours with drying time between each step.
Similar to Vulture’s water, I used a small bunch of fishing line glued (Superglue) together at one end and glued into place at the spout. I used acrylic varnish (hobby store acrylic paint types such as Apple Barrel) in the basin to fix the “splash” end into the acrylic water puddle. Once it was all in and dry the whole mini got a protective clear coat, and the water got another ‘ardcoat (gloss) over the stream and through the entire basin. I wasn’t entirely sure who the effects would photograph so I decided to be lazy and not go back through to texture pool waters or where the splash would occur.
I noticed that a few people actually filled their basins. (Dan and Jessica come to mind) I’m curious as to what you “filled” them with that you then painted? Or is that a trick of the camera angle?
I used envirotex lite, it’s a two part epoxy that dries very clear. I dyed it with a couple drops of green wash and stuck some moss into it to represent algae.
My photo doesn’t show it off well, but I used Woodland Scenics Realistic Water. Comes in a big bottle and you just pour it in and let it set. It shrinks in volume as it dries, so you have to do a couple of rounds if you’re trying to achieve any depth, but it’s good for small projects like this. I prefer the Envirotex that Jessica used for larger projects, but I always overmix for tiny projects like this one!
I really like the glowing cracks, both on David’s and on the Ruins back of Tanya’s.
Super cool, guys and gals. I really dig Jim’s light-up well, Vulture’s verdigris, Jessica’s basing, and Laura’s sandstone color scheme. I also always love seeing some Hirst Arts in action – the “washbasin” is an inventive build as well! Pats on the back all around!
Hirst Arts is really cool. I have some of the molds, and great intentions, but it seems like something always comes up that keeps me from playing around like I want to with the molds… 😦
Neat stuff this week, Dig Jessica’s use of moss and birch seeds. David’s glowing cracks turned out great as did the glow that Jeff did. And I’d love to see more shots of the LED setup Jim did. Dan, nice detail adding the reflection to the water. Tonya, I love the details you pulled out of the faces. Some smooooooth brushwork there. Vulture’s watereffects are perfect, with the ripples and the “dankness”. Magnus and David both nailed the “ruined opulence” look, whereas Dan and Arjen’s truly look like ancient artifacts.
I agree with Tonya, kudos all around, everyone!
The LED setup that I did for the pic was REALLY simple. I hooked up an LED and stuck it in the hollow spot under the Well of Chaos. That’s it. Oh, and I turned the LED on. Bones are apparently translucent, so all of that is natural without doing any work besides sticking the LED under the mini. If I wanted to stop the glowing thru the front, and only have it show thru the top, I’d probably have to paint underneath the mini on the inside to stop that glow. I discovered it completely by accident and thought it was neat.
The hardest part was taking the picture. I couldn’t use a flash, because that drowned out the LED lighting. That’s why my picture wasn’t the greatest. I’m just a rookie with taking pictures too, but I plan on making a light box that will help some with that.
Where’s the battery? Is there a switch?
What a cool accidental discovery! I have to pick up some of these LEDs and experiment around with them now!
(Dan). I used e-z water. It’s a melt-able filler I found at hobby lobby for train scenery. I painted my blue swirls in the basin first, then filled the cavity. Unfortunately, it sets fast and there are a couple voids. I probably won’ t attempt it again on a plastic mini. I singed the mini a bit and lost a lot of detail in the fountain’s face.